3D & Augmented Reality
Use the 3D / AR component to display a GLB or glTF model, save camera views as markers, place interactive hotspot markers on the model, and launch an AR view on supported mobile devices.
Add a 3D model
Your source model must be in GLB or glTF format.
To convert an FBX file to GLB, you can use a service such as
clara.io.
- Compress your model into a ZIP archive.
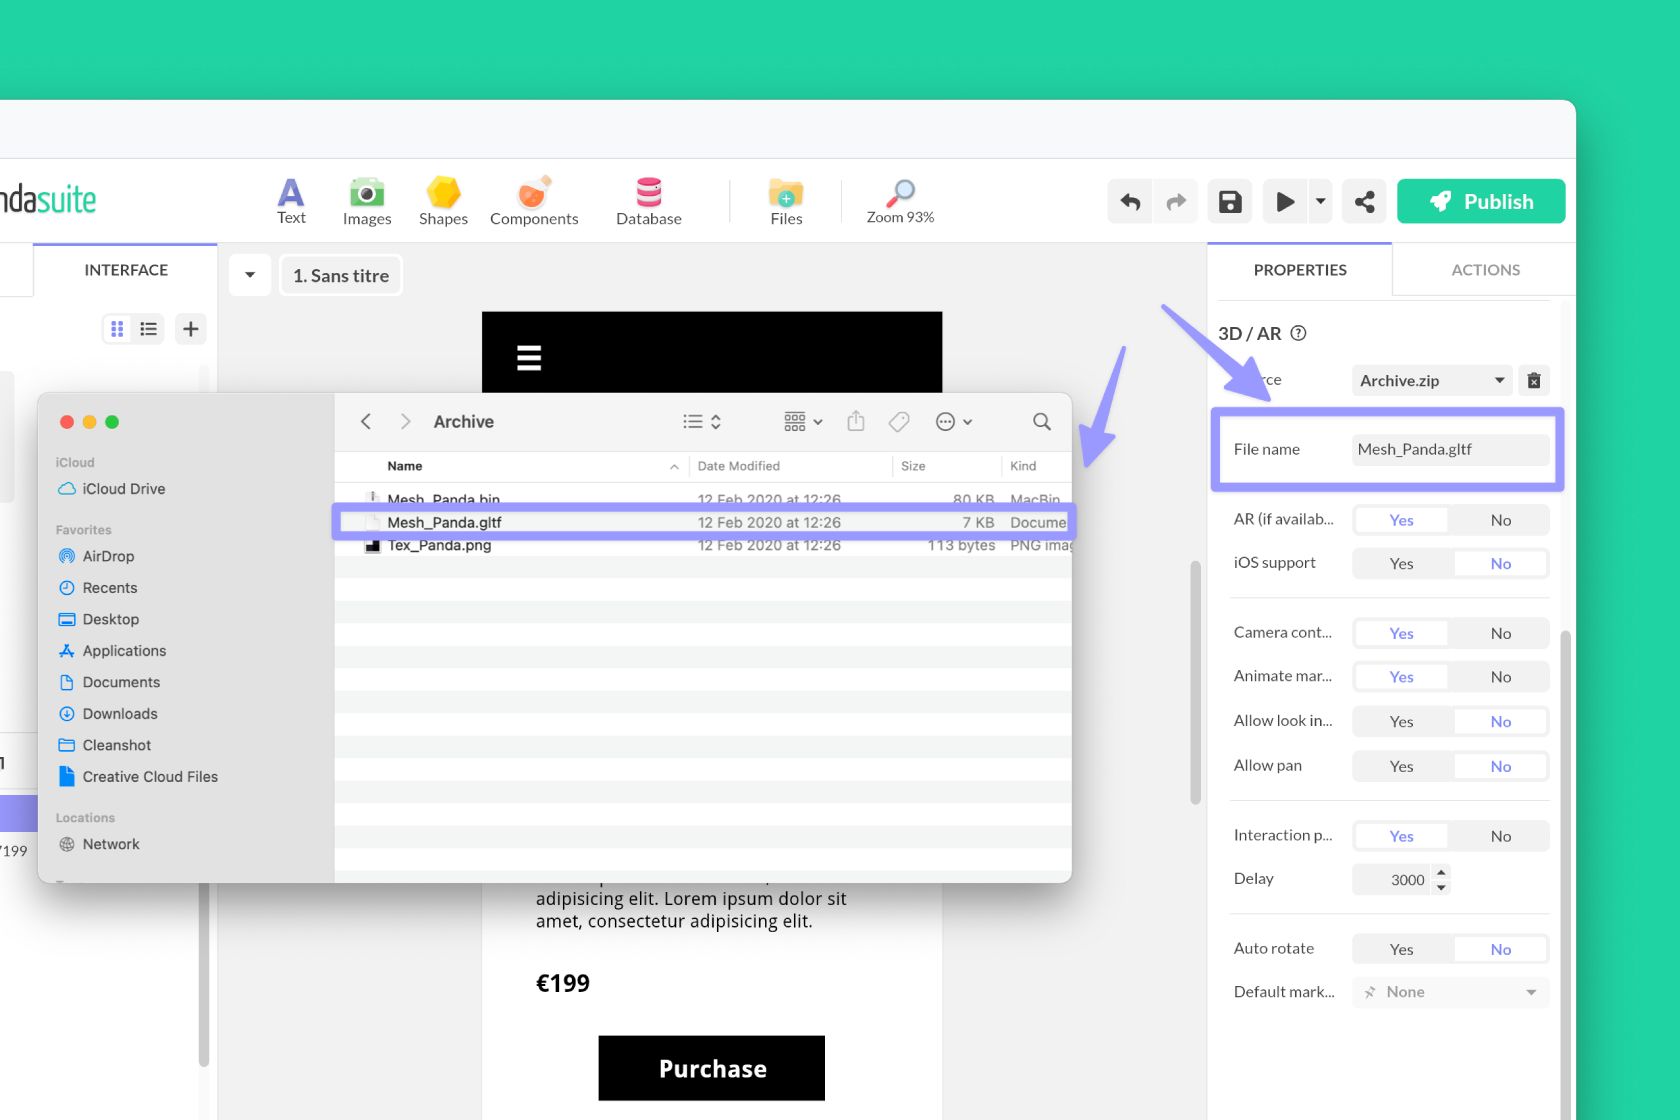
- In PandaSuite Studio, open Files and import the ZIP file.
- Insert the 3D / AR component from Components.
- In Source, select your ZIP file.
- In File name, enter the exact file name or path of the
GLBorglTFfile inside the archive.
If you want to use a custom environment image, add it to the component resources as Environment. If you want to support AR on iOS, include a matching USDZ file in the same ZIP archive.
Double-click the component on the canvas to enter the 3D view. From there, you can move the camera, inspect the model, create markers, and add interactive hotspot markers. Use the breadcrumb to return to the screen.
Main properties
The 3D / AR component exposes the following main properties:
- Camera controls: lets users rotate and zoom around the model.
- Allow pan: lets users move the view horizontally and vertically.
- Allow look inside: lets the camera orbit move closer to or inside the model.
- Animate markers position: animates the transition when moving from one camera marker to another.
- Interaction prompt and Delay: displays a hint that encourages users to interact with the model after a delay.
- Auto rotate and Delay: starts rotating the model automatically after a delay.
- Environment image: uses Neutral, Legacy, or Custom lighting.
- Use as skybox, Skybox height, and Unit: available when using a custom environment image as the scene background.
- Exposure, Shadow intensity, Shadow softness, and Tone mapping: adjust the rendering of the model.
- AR (if available), iOS support, and USDZ File name: enable and configure the augmented reality experience.
Use two kinds of markers
The 3D / AR component supports two different marker workflows:
- Camera markers save a camera view around the model.
- Interactive hotspot markers add a clickable point directly on the model surface.
Both appear as PandaSuite markers, but they are used differently.
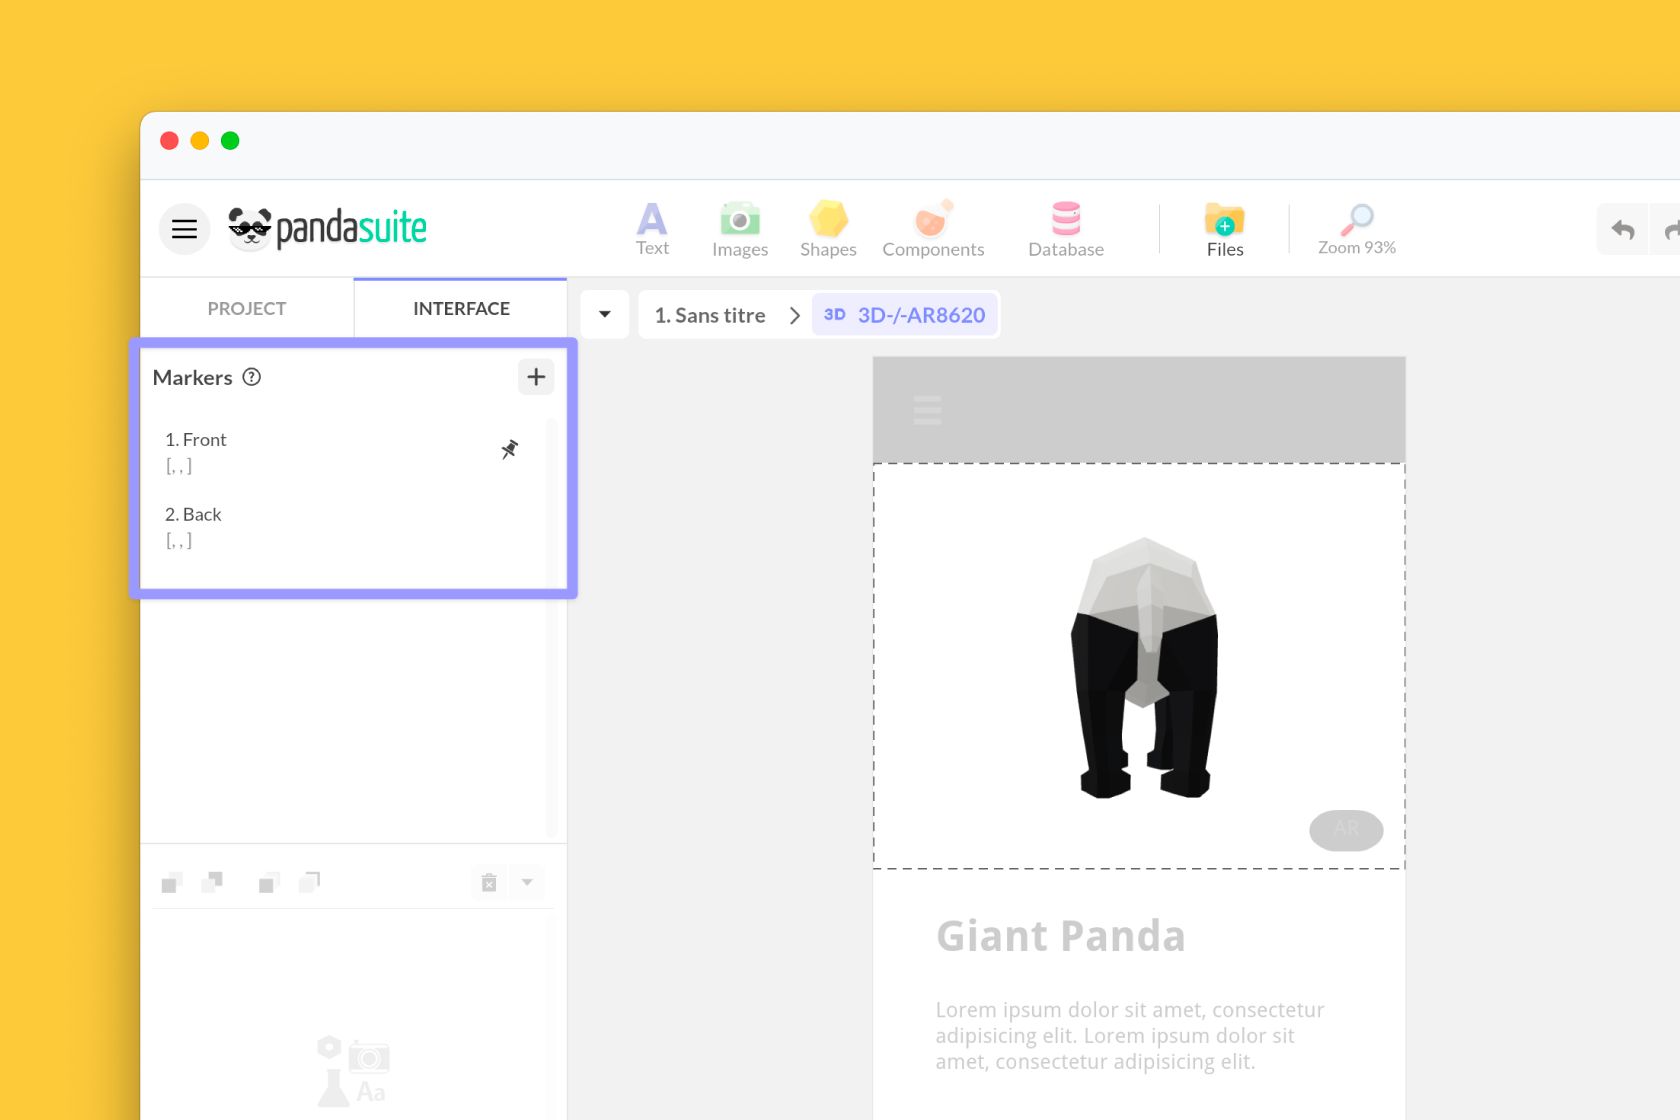
Camera markers
Use camera markers when you want to save a viewpoint and come back to it later.
To create one:
- Double-click the component to enter the 3D view.
- Place the camera on the exact angle you want to save.
- Click the + button to create a marker.
Camera markers are useful for:
- guiding the user through several predefined views of the same model;
- synchronizing the camera with another component;
- creating smooth animated transitions between viewpoints when Animate markers position is enabled.
Interactive hotspot markers
Use an interactive hotspot marker when you want the user to tap or click a precise point on the model.
In Studio, open the 3D view and click Add Hotspot. Then click the model to place the hotspot. Each hotspot becomes a PandaSuite marker that you can use as a trigger.
For each interactive hotspot marker, you can configure:
- Color
- Size
- Min opacity
- Max opacity
- Show annotation
- Message
- Color and Text color for the annotation
This makes interactive hotspot markers useful for:
- opening a Pop-up with more information;
- changing a Multi-state component;
- guiding a product tour or a training experience with clickable points of interest.
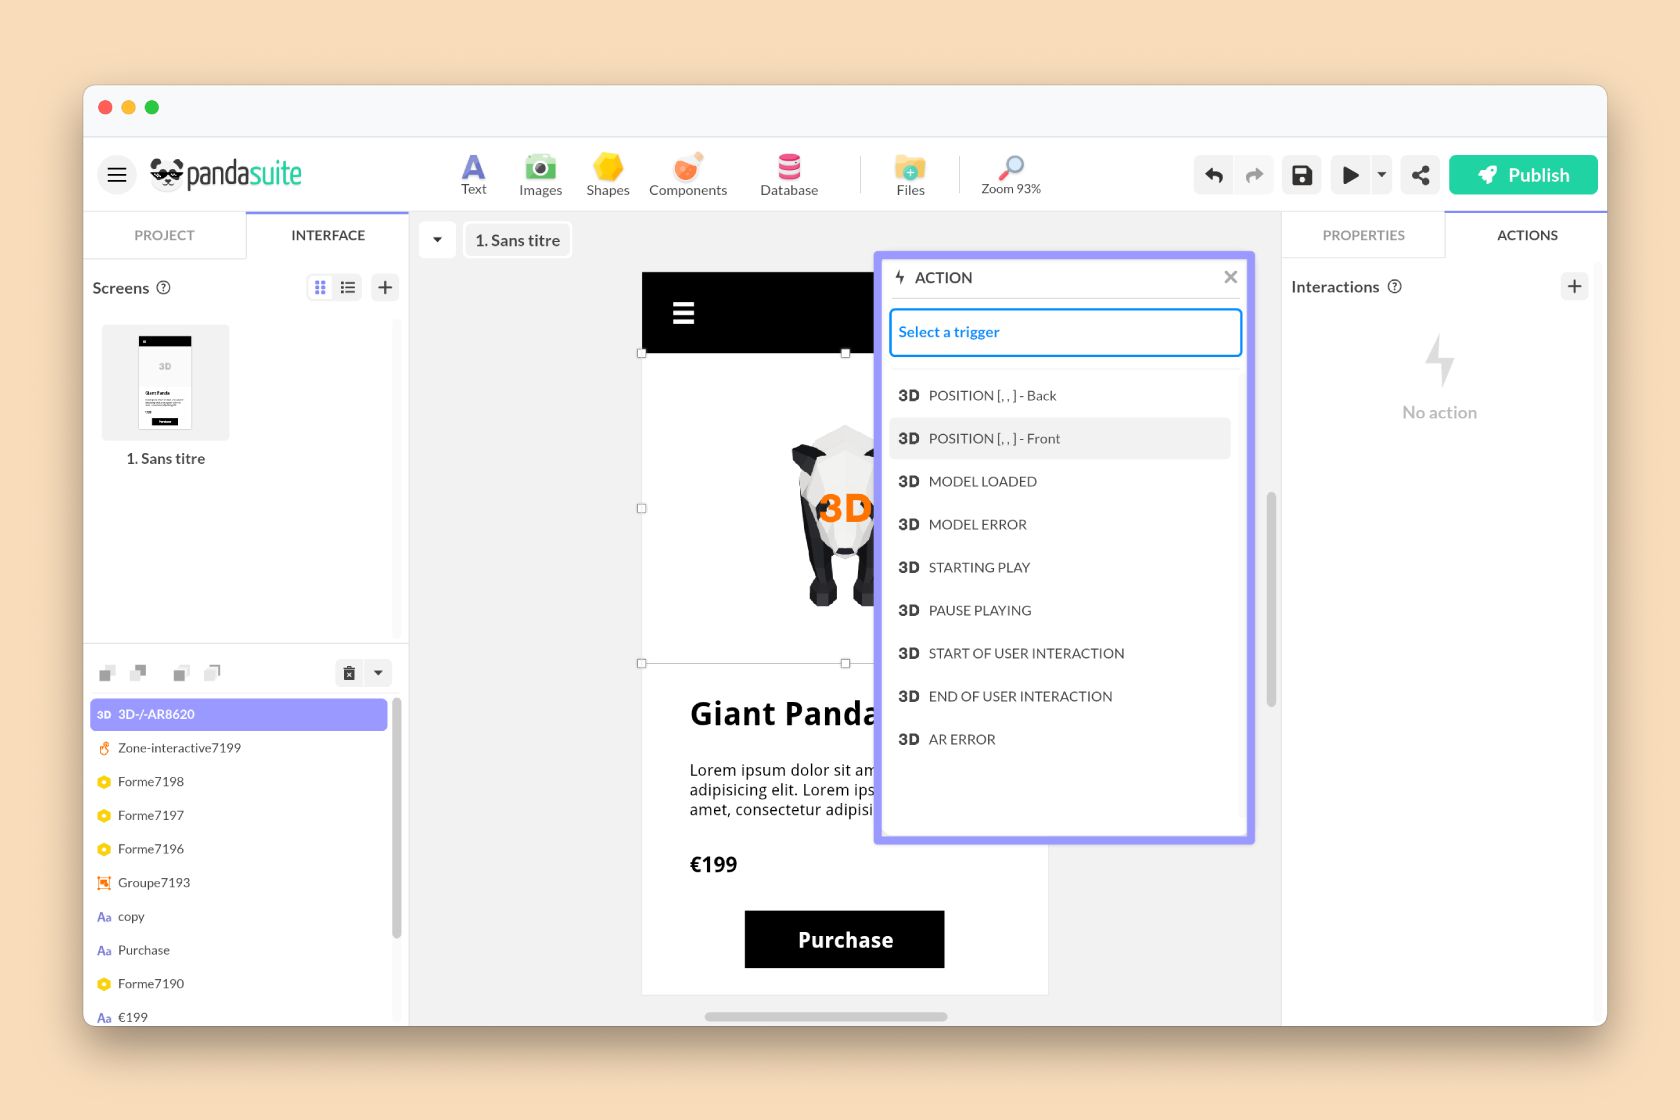
Available triggers
In the Actions tab, the 3D / AR component provides these triggers:
- Position: triggered by a marker. This can be a saved camera marker or an interactive hotspot marker.
- Model Loaded
- Model Error
- Starting play
- Pause playing
- Append animation
- Detach animation
- Start of user interaction
- End of user interaction
- AR Error
The animation-related triggers also expose Animation # and Animation name, which you can reuse in your logic.
Available actions
Use Interact with a component to control the 3D / AR component from another interaction. The available actions are:
- Change Position
- Play
- Pause
- Append animation
- Detach animation
- Recenter
- Activate AR

Change Position
Use Change Position to move the camera to a saved camera marker.
When Animate markers position is enabled, you can also adjust Interpolation decay (ms) to control how quickly the camera settles into the new view.
Play
Use Play to launch one of the animations embedded in the model:
- Animation #: selects which animation to play.
- Ping-pong: plays forward then backward in a loop.
- Loop: plays continuously.
- Repetitions: number of repetitions when Loop is disabled.
Append animation and Detach animation
Use Append animation to add an animation layer on top of the current state, and Detach animation to remove it.
Append animation parameters:
- Animation #
- Weight
- Speed
- Ping-pong
- Loop
- Repetitions
- Fade in and Fade in duration
- Warp speed, Warp duration, and Relative warp
- Start time
Detach animation parameters:
- Animation #
- Fade out
- Fade out duration
Recenter
Use Recenter to reset the camera target on the model.
Synchronize with another component
Like any component, you can synchronize your 3D model with another component such as a scrolling area.
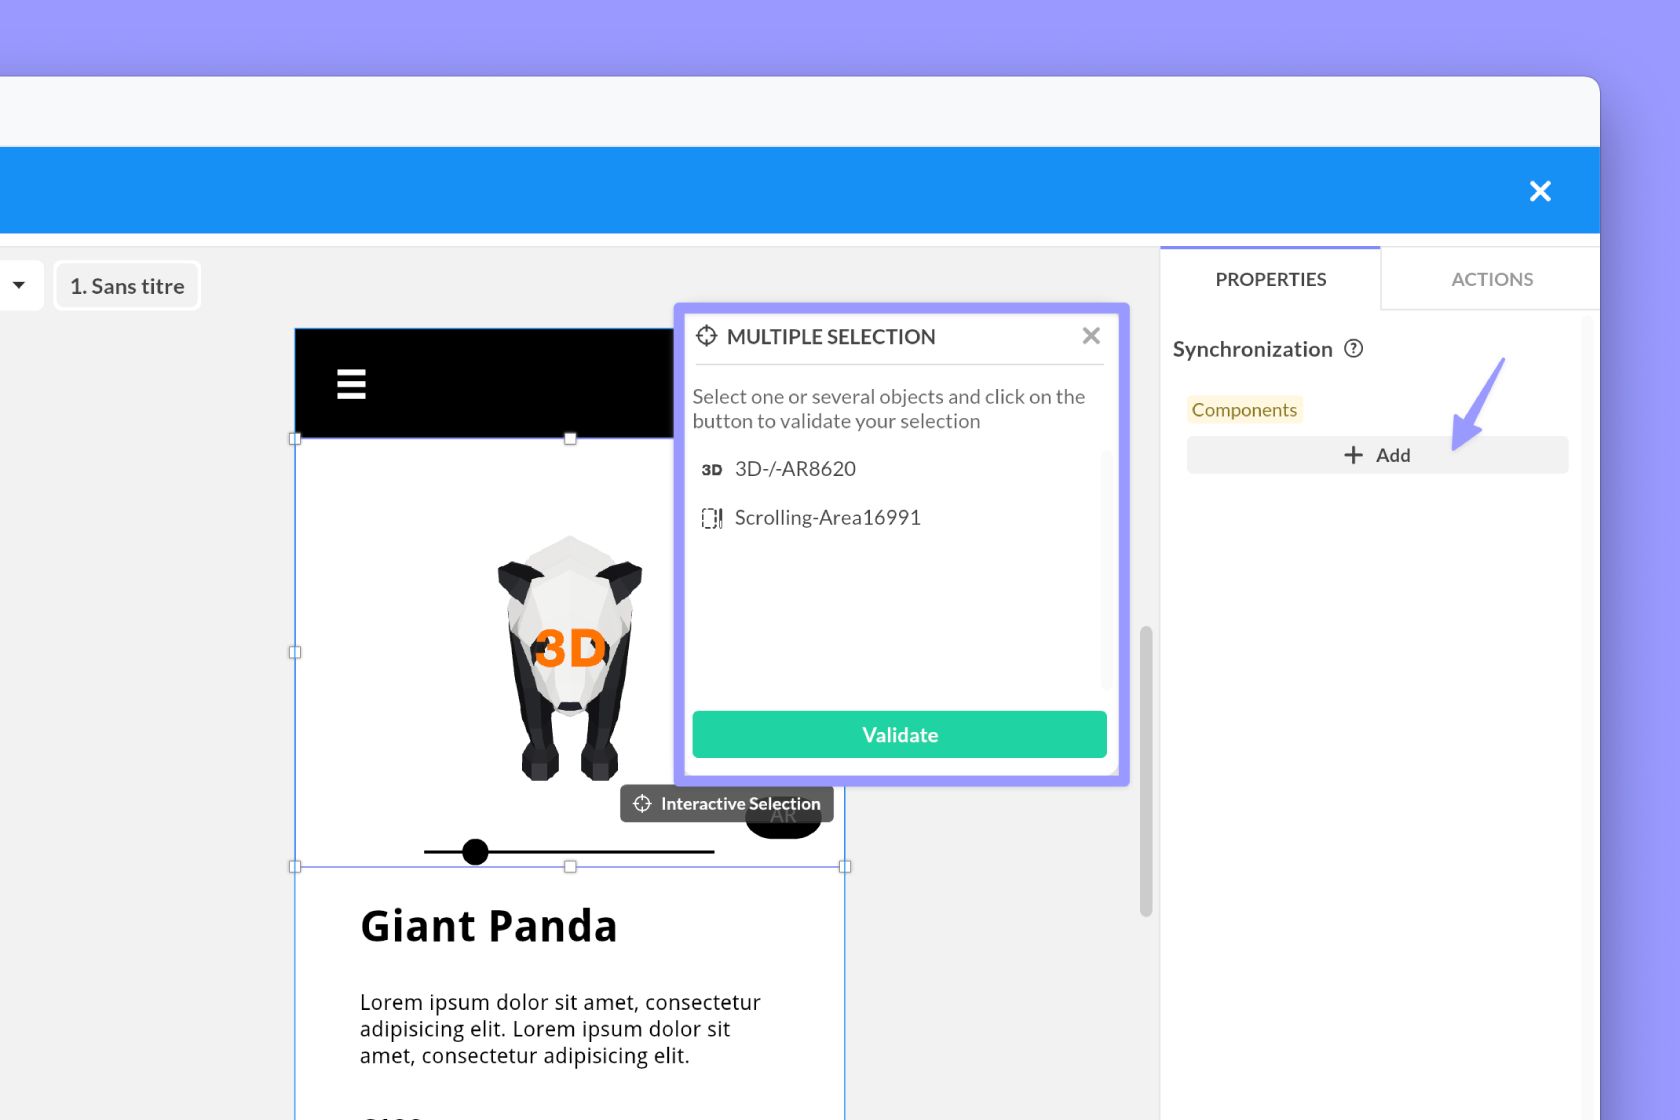
To create a synchronization:
- Insert the Synchronization component.
- Click + Add in its properties.
- Select the 3D / AR component and the second component.
- Choose Synchronize markers.
Synchronization uses camera markers only. Interactive hotspot markers are ignored in synchronization.
Launch the AR experience
On iOS and Android, you can display the 3D object in augmented reality above the device camera.
To configure AR:
- Enable AR (if available).
- On iOS, enable iOS support.
- Enter the USDZ File name that matches the file included in your ZIP archive.
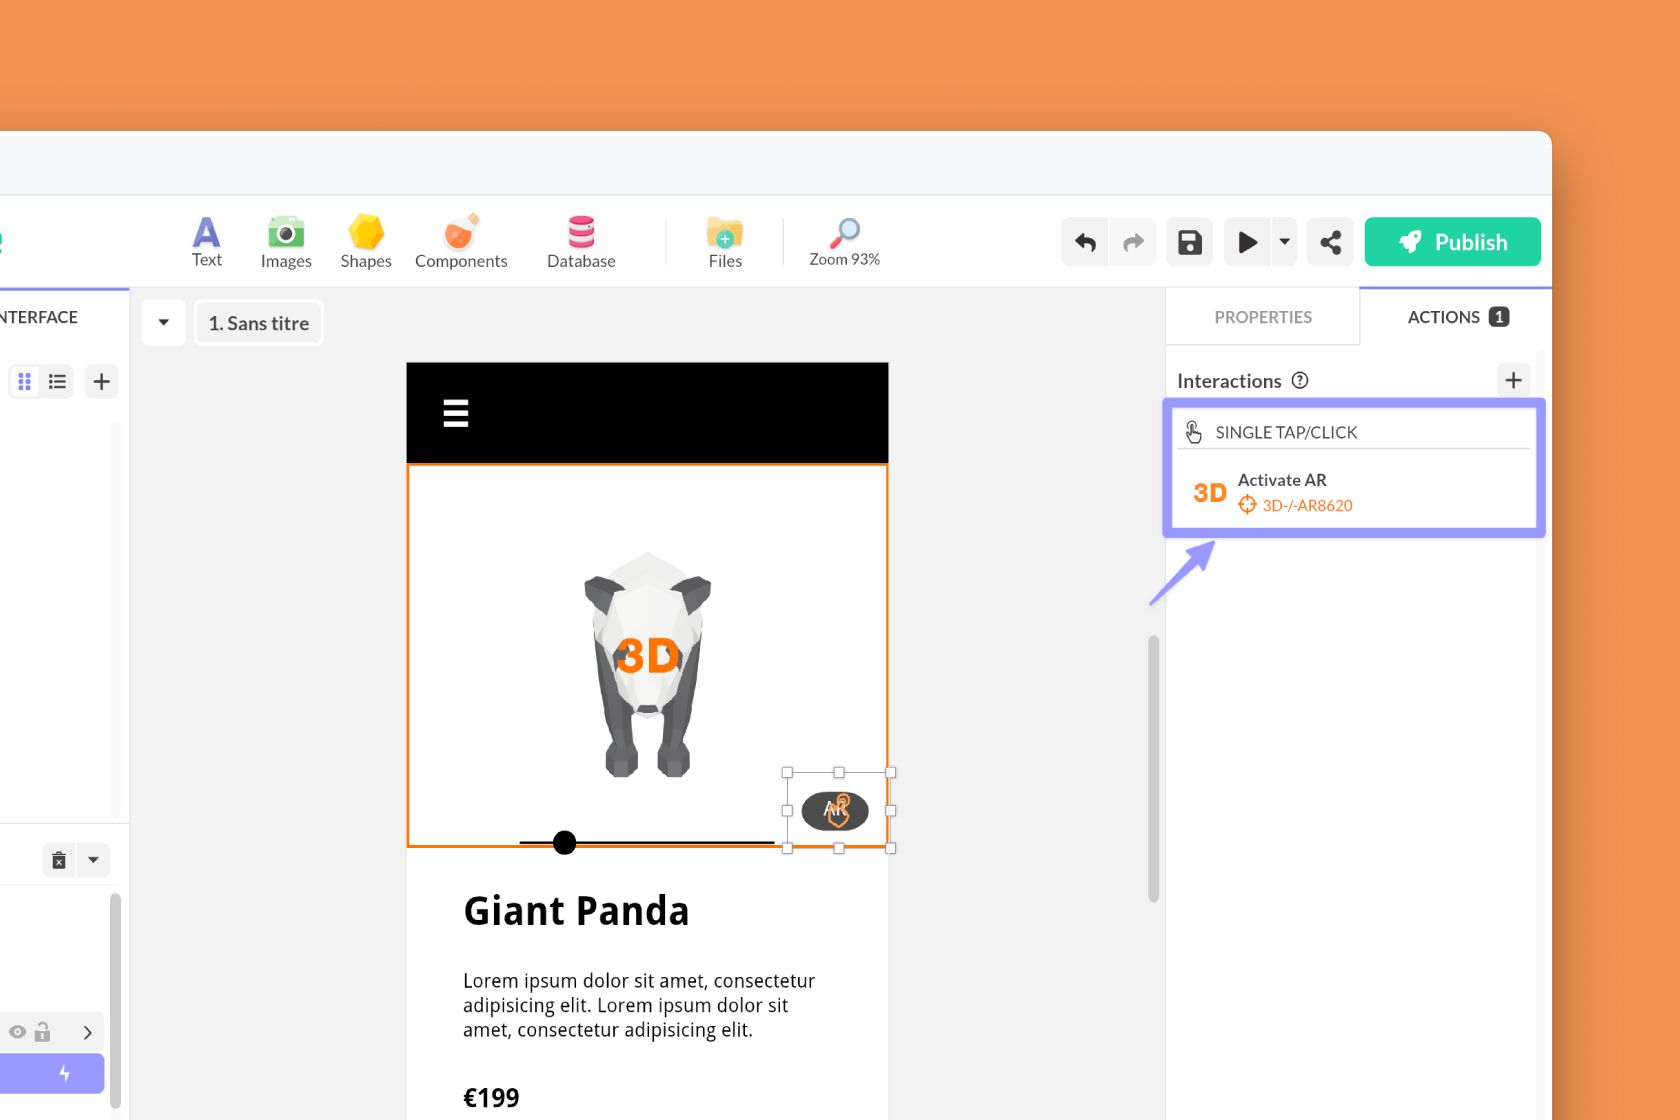
To launch AR from your interface, create a button and use
If the device cannot launch AR, the component triggers AR Error. You can use this trigger to display fallback content.
Practical example: trigger content from a hotspot
One common workflow is to place several interactive hotspot markers on a product or a scene, then use them to reveal extra information.
- Add a hotspot on each point of interest.
- Enable Show annotation if you want a label directly on the model.
- Create a Pop-up or a Multi-state component.
- In the hotspot marker trigger, choose Position.
- Associate the action that opens the pop-up or changes the state.
This lets users explore the model visually and access content only when they interact with a relevant detail.