Current Date & Time
Use the current date and time to display information and trigger actions at the exact right moment.
You can work with a Date data type in the Datastore (often easier to edit) or with a timestamp (universal reference).
In this article, you will:
- understand what a timestamp is and where to find it in PandaSuite
- display the date/time in the interface (formatted)
- trigger an action automatically at a specific date/time
- apply best practices (units, time zones, “guard” variable)
Use cases
- Automatically unlock an “Event” section at its start time
- Display a pop-up on a specific day
- Hide an offer at its expiration date
- Launch an animation or change state at the desired moment
Two complementary approaches
Date type (Datastore)
- Readable and editable directly in the Datastore (e.g. 11/20/2020 10:21:05).
- Ideal for setting start/end dates without an external converter.
- Simplified comparisons and formatting.
When to use it:
- You want to enter/update dates in PandaSuite Studio.
- You don’t want to use an external converter.
Timestamp (universal reference)
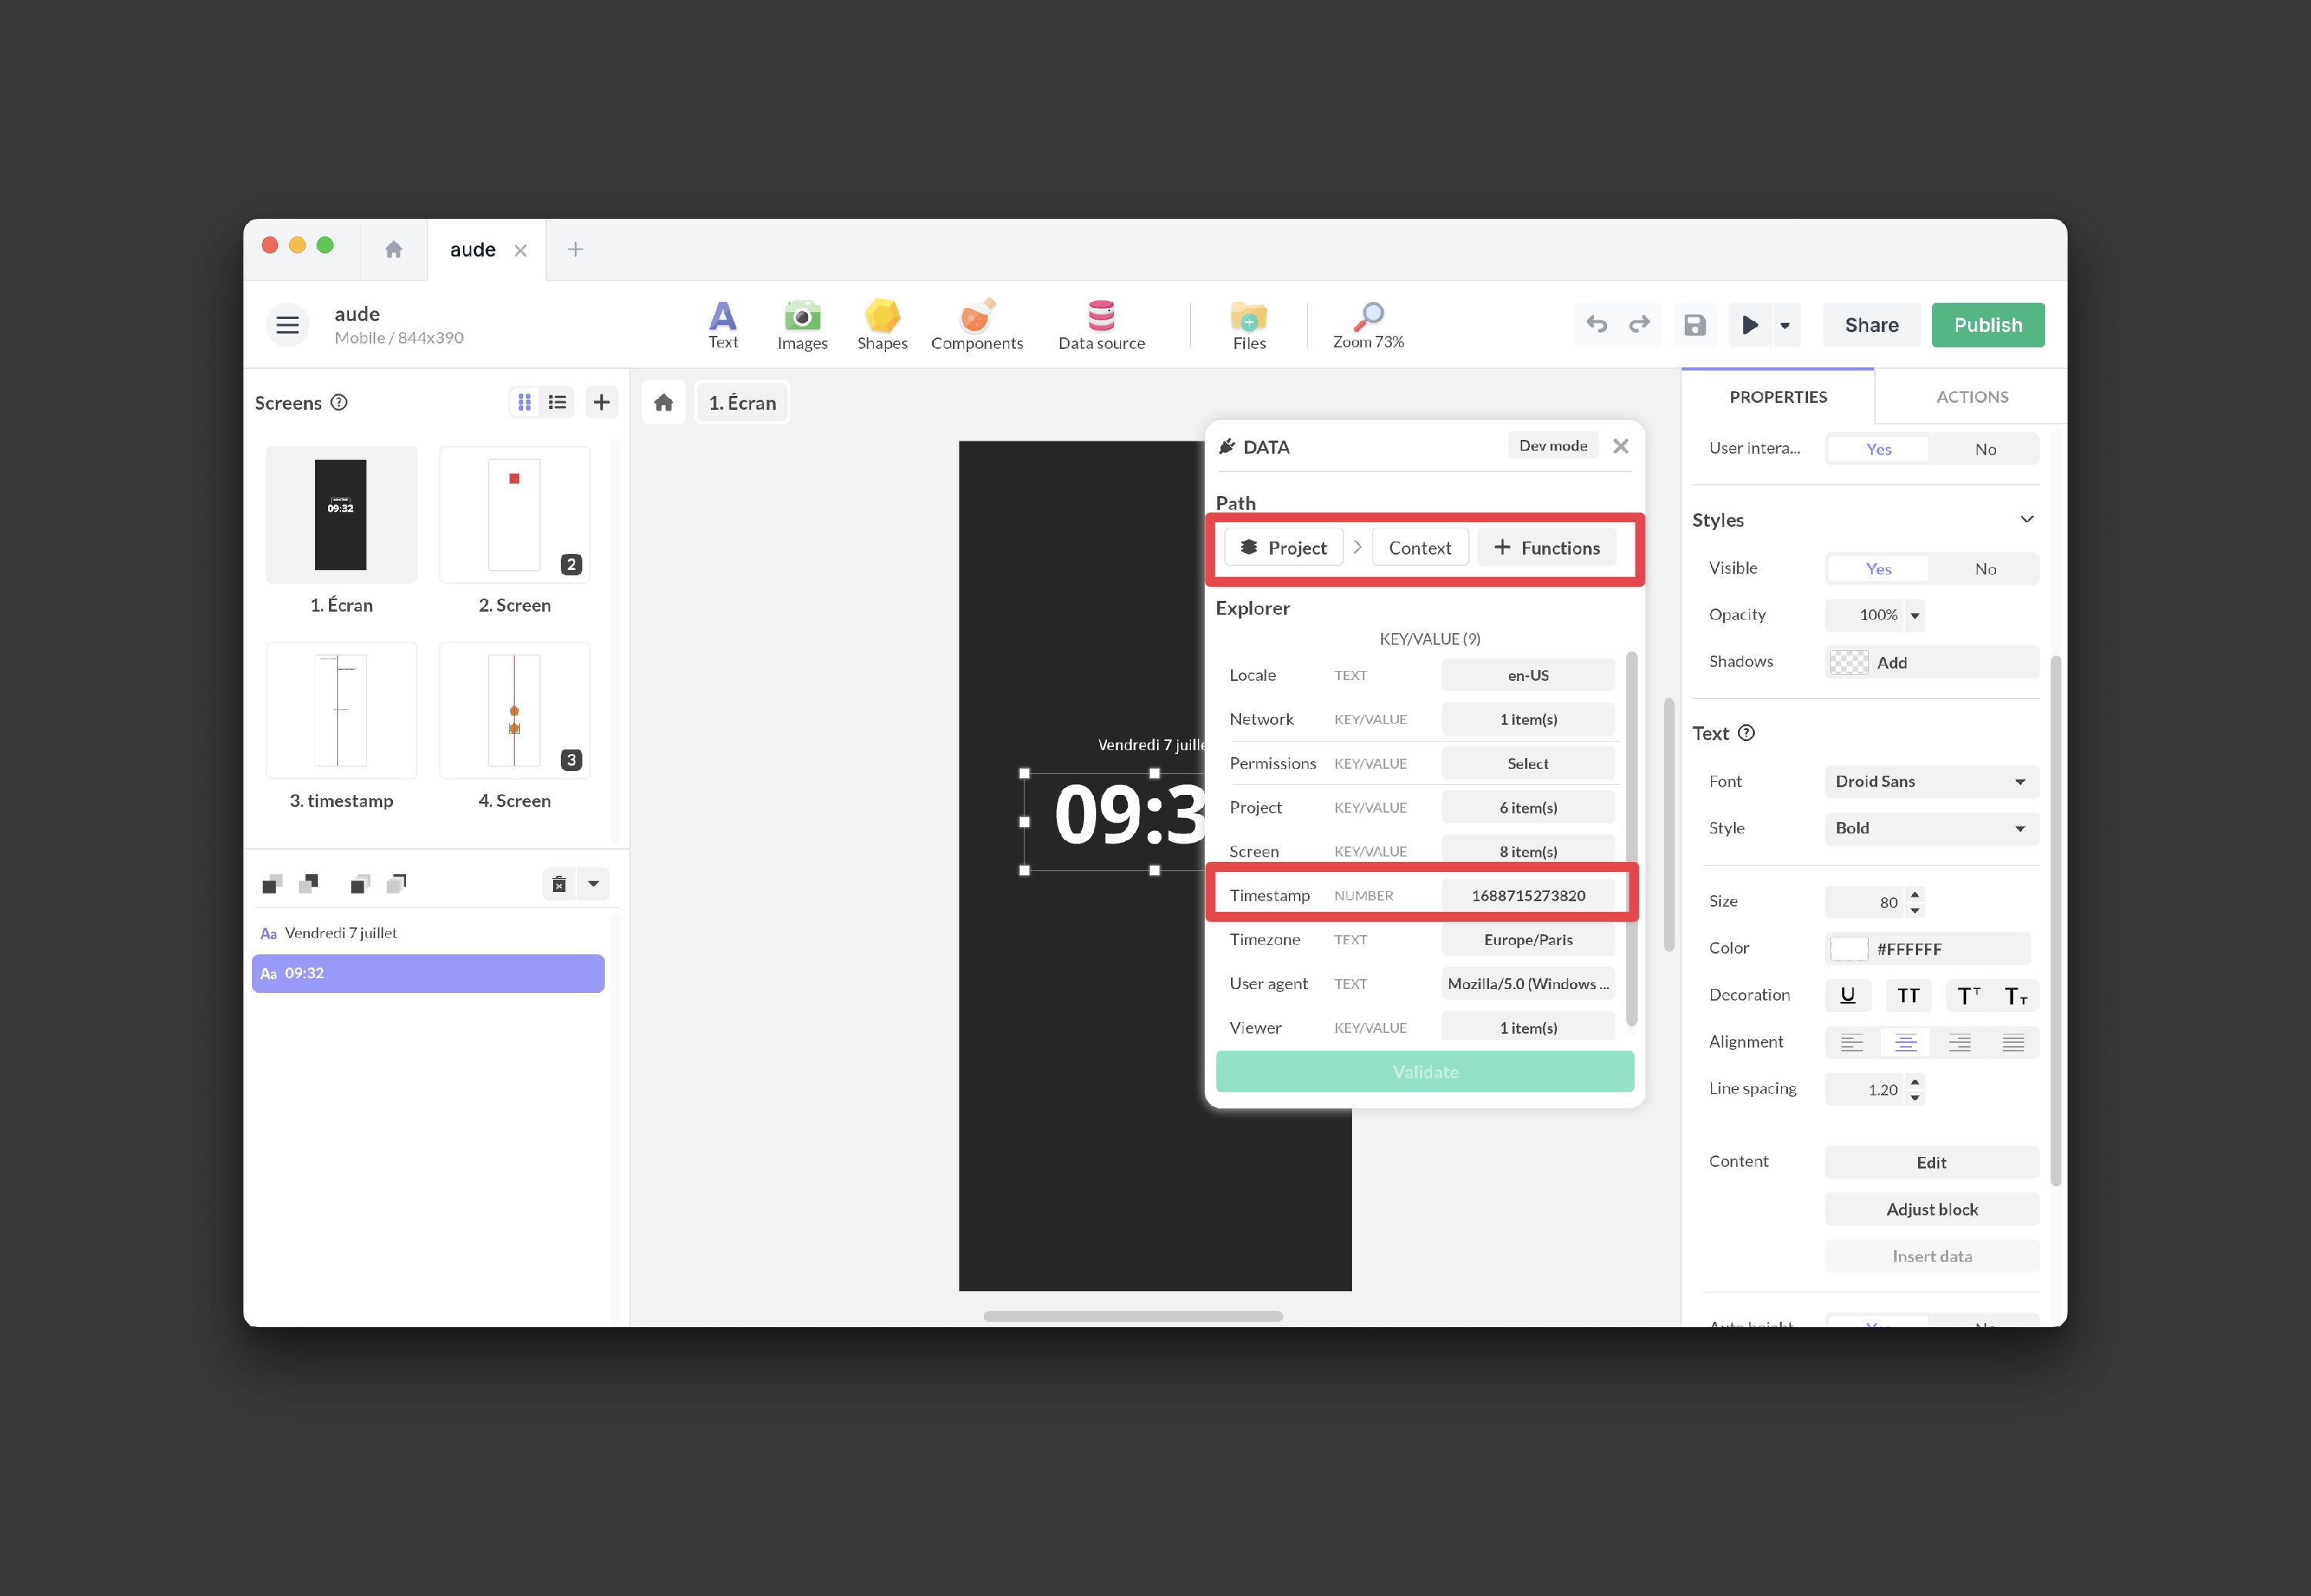
The timestamp is the number of seconds elapsed since January 1, 1970 at 00:00:00 UTC. It is based on the device’s clock.
In your project, it is accessible via data binding: From the project > Context > Timestamp
To define the timestamp of a date using an online converter, check the unit:
- In seconds: 1704067200
- In milliseconds: 1704067200000
In PandaSuite, we use the value in seconds.
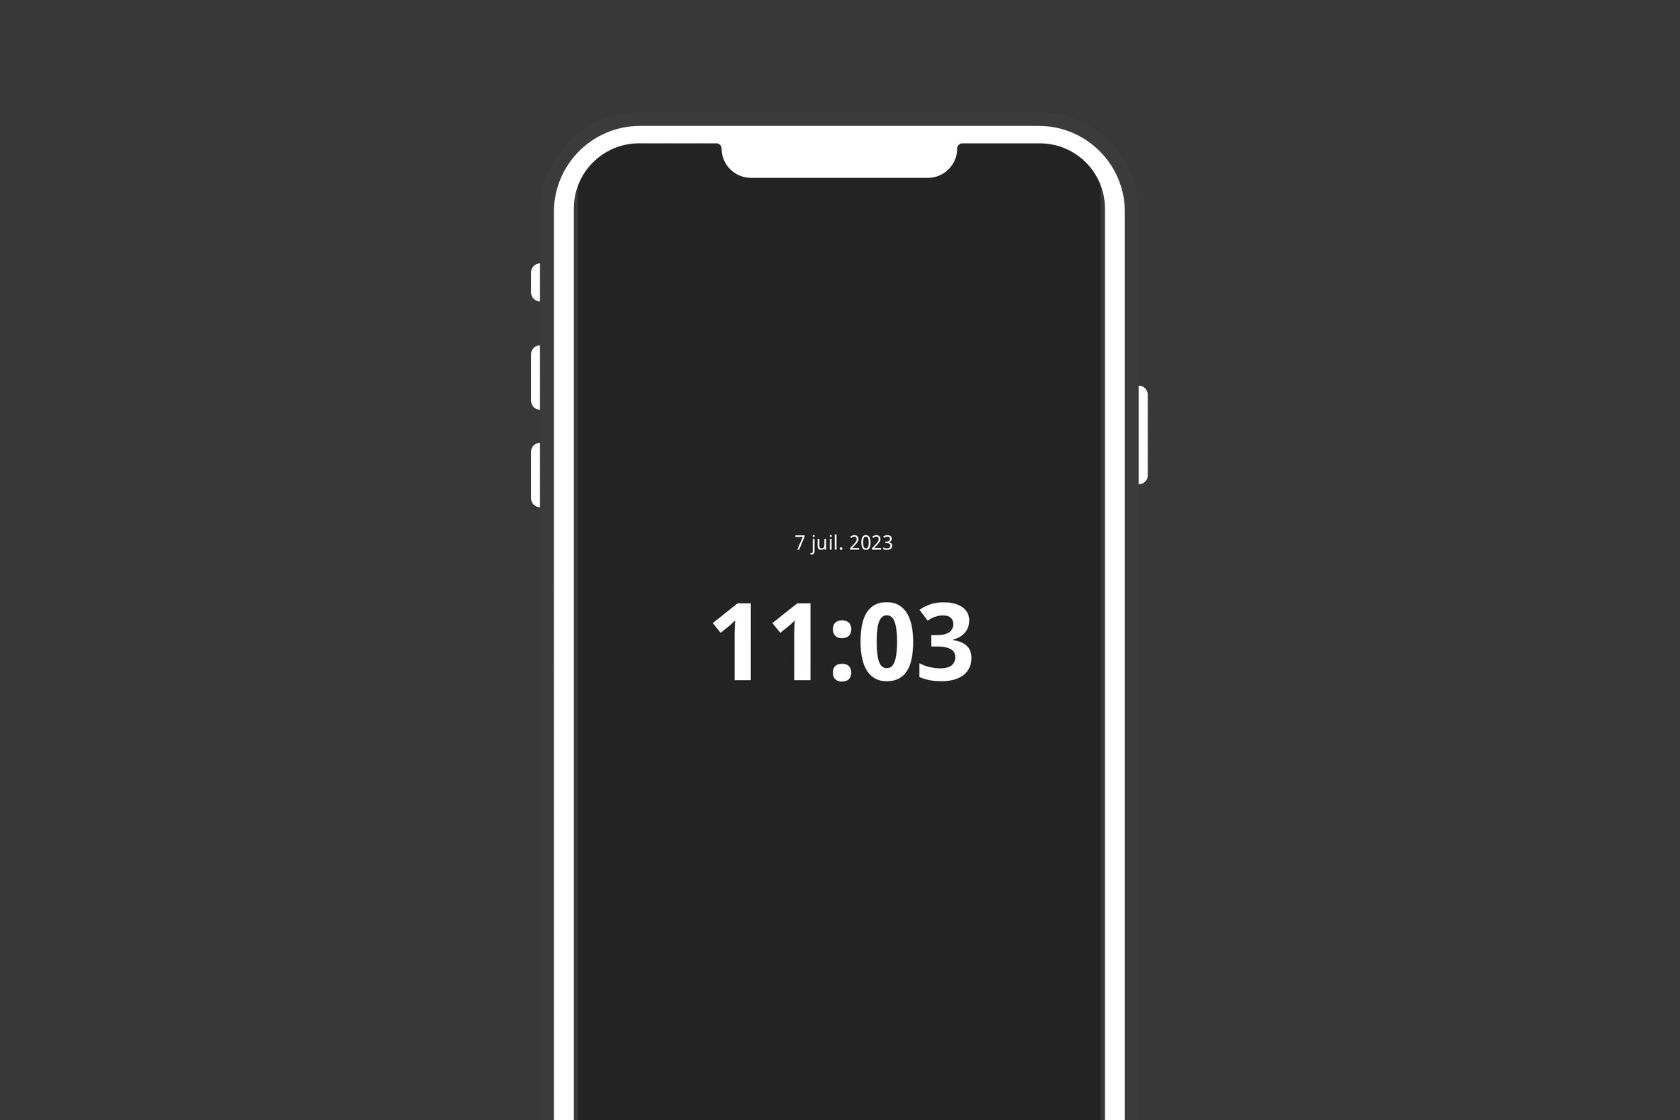
Displaying time in an application
Goal: display the current date/time in the format of your choice.
- Insert a text block into your screen.
- Add a data binding to the Content property and choose Project > Context > Timestamp as the data source.
- In the function chain, convert to milliseconds if needed: Multiply: 1000
- Apply the Format Date function to define the display format (examples: HH:mm, dd/MM/yyyy)
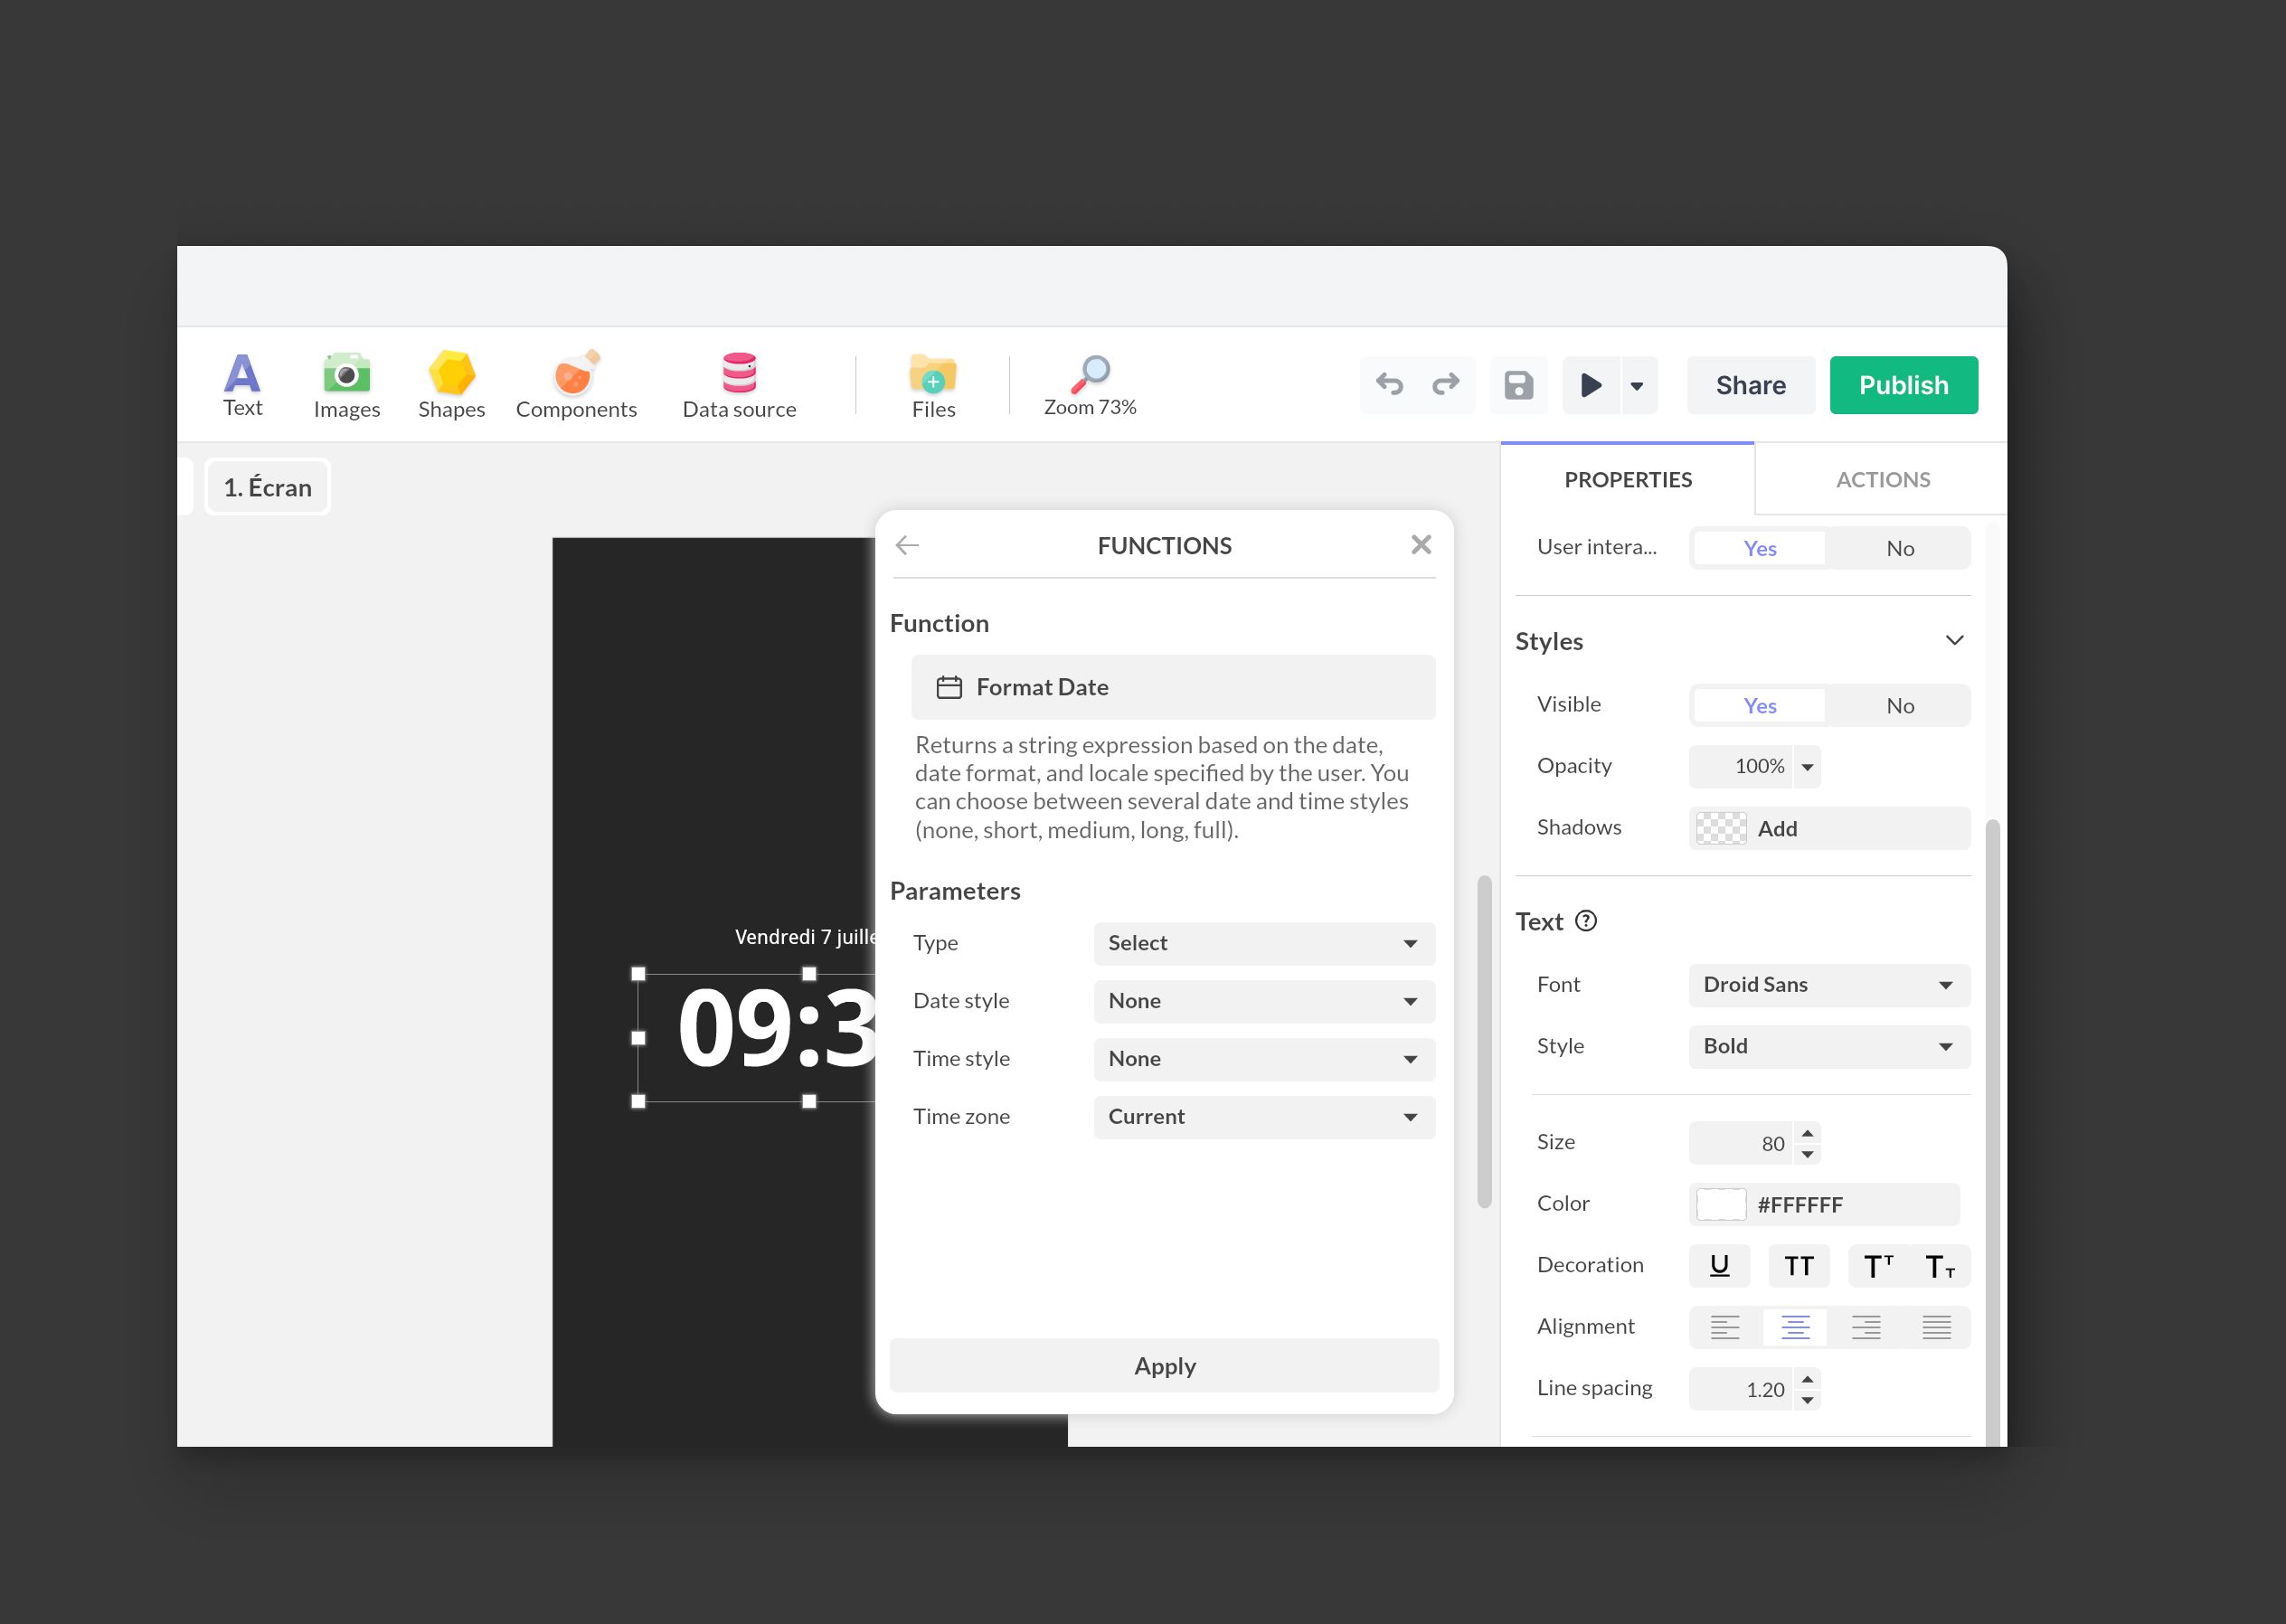
Formatting tips:
- Format Date expects a value in milliseconds. Multiply the timestamp (seconds) by 1,000 if needed.
- Choose the time zone in the function (e.g. UTC, Europe/Paris).
- Format code examples: HH:mm (24h), dd/MM/yyyy, EEEE d MMMM yyyy.
Trigger an action at a specific date/time
Goal: automatically run an action when the current time reaches your target date.
Step 1: define the target date (in seconds)
Option A — External converter
Use a converter (e.g. https://www.epochconverter.com/).
Check the unit: retrieve the value in seconds (e.g. 1735689600 for January 1, 2025 00:00:00 UTC).
For “midnight in a specific timezone”: calculate the timestamp corresponding to 00:00:00 in that timezone, then use the UTC value (the timestamp always represents an absolute instant).
Option B — 100% PandaSuite (recommended if you edit the date in Studio)
Create a Date property in your Datastore (e.g. target_date).
Triggering relies on the local clock. A manual time change or an inaccurate clock may delay execution. For sensitive cases (compliance, contests), prefer a server-side time reference via an API (HTTP component).
Step 2: configure a Condition component
Click Components > Condition. Place it at the Project level if the action can occur anywhere in the application. Rename it (e.g. “Date reached condition”).
In the Condition component properties, add a condition with an expression:
- Data: Project > Context > Timestamp
- Function: Greater than or equal to
- Value: your target timestamp (in seconds)
Enable Automatic evaluation.
Note: Automatic evaluation re-runs the condition when its attributes change, but the Timestamp does not update on its own. You need to schedule its evaluation (step 3).
Step 3: schedule the evaluation
Choose one of the following options depending on the precision required:
Option 1 — Periodic evaluation (precise, recommended)
- Add a Timer at the Project level.
- Duration: 1 s.
- Auto-play: enabled.
- Loop: enabled.
- In the Timer Actions:
- Trigger: End of playback
- Action: Interact with a component > Condition > Evaluate condition
- The cycle repeats every second; the condition fires as soon as Timestamp ≥ target.
Option 2 — Event-based evaluation (simple, less precise)
- Project > Triggers:
- Project launch > Interact with a component > Condition > Evaluate condition
- Focus gained > Interact with a component > Condition > Evaluate condition
- Useful if the application does not need second-level precision.
Step 4: add the action to run “when the condition is true”
Select your Condition component > Actions. Trigger: Condition evaluation. Add your action, for example:
- Interact with a component > Multi-state > Change state (unlock content)
- Interact with a component > Pop-up > Open a Pop-up
- Change screen
- …
Guided example: unlock a section on a specific day
Prepare the states:
- Create a “Before” state (section hidden) and an “After” state (section visible) using screen states or a Multi-state component.
Condition:
- Configure “Date reached” (Timestamp ≥ Target), automatic evaluation enabled.
Actions:
- On “Condition evaluation”: Multi-state > Change state to “After”.
Testing:
- Use a timestamp a few minutes away to validate.
Expected result:
- Before the target date: section hidden.
- After the target date: section visible and persistent.
Best practices and key points
- Units: use a timestamp in seconds in the condition. If you have milliseconds, divide by 1000.
- Time zone: correctly calculate the target date for the desired zone, then use its UTC value in seconds.
- Local clock: the time is that of the device. For sensitive cases (e.g. legal compliance), prefer a validated server-side time source via API (HTTP).
- Single trigger: if needed, use a boolean “guard” variable and set it to true after execution.
- Scope: place the Condition at the Project level if the trigger should be global.
Related resources
Timestamp
Add this template to your account in just a few clicks. Edit and customize it freely.
→ Add this template to your account